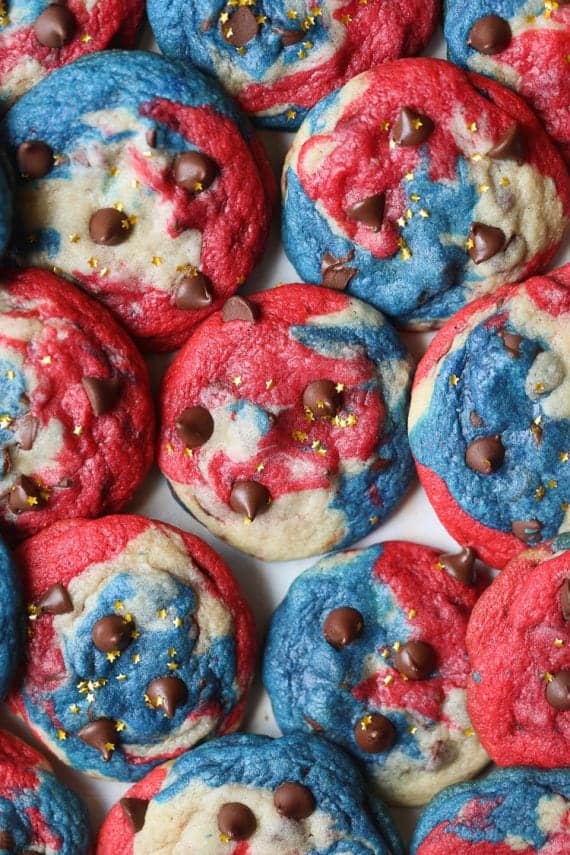
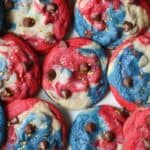
These 4th of July cookies are my soft, chewy chocolate chip cookies colored red, white, and blue for the holidays! These patriotic cookies are easy to make and the perfect dessert for a 4th of July or Memorial Day gathering.

Red, White, and Blue Chocolate Chip Cookies
What’s more festive than a red, white, and blue cookie? I put a patriotic spin on my classic chocolate chip cookies to make them fit for the 4th of July, but these would also be great for Memorial Day or Labor Day parties. They’re soft-baked, chewy at the edges, and loaded with chocolate chips, just like your favorite chocolate chip cookies. What makes these patriotic cookies special is their iconic American flag-inspired coloring.
I use this fun “tie-dye” effect with these 4th of July cookies, but you could use it to color the dough for sugar cookies, too. Once you’ve mastered this easy technique, use it in more recipes like rainbow cookies!

What You Will Need
Here’s what you’ll need to make these patriotic 4th of July cookies. Scroll to the recipe card for the complete recipe, including exact amounts to make the chocolate chip cookies.
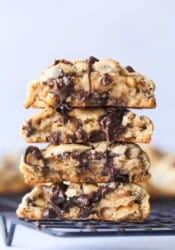
- Cookie Dough – I use my classic chocolate chip cookie recipe, but you can make giant chocolate chip cookies or even copycat Crumbl cookies as the base. If you’re pressed for time, use refrigerated cookie dough from the store!
- Chocolate Chips – These can be semi-sweet, dark, white chocolate chips, or a mix of different baking chips.
- Red and Blue Food Coloring – Avoid the liquid/water-based dyes you find in the baking aisle. Gel food coloring will give you the best, most vibrant color, and a little goes a long way.
- Sprinkles – I use these small gold foil stars as pictured in the photos. You can also use star-shaped sprinkles or any sprinkles you’d like.
The Best Food Coloring
The type of food coloring matters. I recommended gel-style blue and red food coloring rather than the liquid drops you find at the supermarket. Liquid coloring does work, but you will need to use A LOT of it to achieve the bright colors you see in these cookies. Since it’s liquid, adding so much can also impact the texture of the dough. Gel colors are thicker and more concentrated, and you can achieve vibrant patriotic colors with much less.

How to Make 4th of July Cookies
You’ll start by preparing a batch of chocolate chip cookie dough, then it’s a matter of dividing it into patriotic colors and creating a tie-dye effect before baking. The steps are super simple! You can even do this with frozen cookie dough and thaw it first.
Coloring the Cookie Dough
- Make the cookie dough. Prepare the cookie dough by mixing the butter, sugar, and wet ingredients first, then add the flour and chocolate chips.
- Divide and color the dough. Next, divide the dough into three equal portions. Dye the first portion red. Leave one dough portion uncolored (“white”), and dye the third portion blue.
Shaping and Baking the Cookies
Next, follow these steps to make the tie-dye cookie dough.


- Shape the dough. Next, place a piece of plastic wrap on the counter. Form each dough portion into a 15-inch log. Arrange the three logs on top of the plastic wrap. Roll the dough tightly inside the plastic wrap, forming one large log.
- Portion the cookies. Now, remove the cling wrap and use your hands to break off pieces of dough, approximately 2 tablespoons in size. Roll the dough into a loose ball and place it onto a parchment-lined baking sheet.
- Bake. Bake the cookies at 350ºF for 9 minutes, until they’re just set at the edges. Do not overbake. If you’re adding foil sprinkles, press them into the tops of the warm cookies. Allow the cookies to cool for a few minutes on the baking sheet, then move them to a wire rack.

Recipe FAQs
The chocolate chip cookies are done when they’re set at the edges, and still soft (but not wet) in the centers. If your cookies are browned, they’re overbaked.
If you’re using edible foil stars as I have, add these after baking. If you’re adding traditional sprinkles, these can be added before baking the cookies.
Yes! Once you’ve wrapped the colored cookie dough log in plastic wrap, you can refrigerate it for up to 3 days before baking. Alternatively, freeze the cookie dough for up to 1 month and thaw it before you portion and bake the cookies.
Storing Leftover Cookies
- Store airtight. Keep the baked and cooled cookies covered on the countertop for up to 4 days.
- Freeze. You can freeze the baked cookies for up to 3 months. Thaw them at room temperature.
More 4th of July Desserts
4th of July Cookies
- Prep Time: 15 mins
- Cook Time: 9 mins
- Total Time: 24 mins
- Yield: 24 cookies 1x
- Category: Cookies
- Method: Baking
- Cuisine: Dessert
Description
Celebrate the 4th of July or Memorial Day with patriotic red, white, and blue chocolate chip cookies! These are soft-baked, festive, and easy to make from classic cookie dough.
Ingredients
- 1 cup butter, room temperature
- 1 cup granulated sugar
- ½ cup light brown sugar
- 2 teaspoons vanilla
- 2 eggs
- 1 teaspoon kosher salt
- 1 teaspoon baking soda
- 3 cups flour
- 2 cups chocolate chips
- red and blue food coloring
- golden star sprinkles, if desired
Instructions
- Preheat the oven to 350°F. Line a baking sheet with parchment paper and set aside.
- In the bowl of your stand mixer fitted with the paddle attachment mix the butter and both sugars together for 2 minutes on medium speed until light and fluffy. Add in the egg, vanilla, salt, and baking soda and continue mixing for 1 minute until smooth, scraping the sides of the bowl as necessary.
- Turn the mixer to low and add in the flour, mixing until just incorporated.
- Stir in the chocolate chips evenly.
- Divide the cookie dough into 3 equal portions. Using the food coloring, color one portion of the dough red, and the other blue, leaving one uncolored.
- Roll each dough into approximately a 15-inch rope. Place the three next to each other on a large piece of cling wrap. Wrap the cling wrap up tightly, pressing the doughs together forming a large log. Remove the cling wrap and breaking off the dough with your hands into approximately 2-tablespoon portions. Roll the dough into a loose ball and place it onto the prepared baking sheet and bake for 9 minutes or until the edges are set. Don’t over bake these!!
- Allow the cookies to cool on the baking sheet for 3-4 minutes and then transfer to a wire rack to cool completely.
- If desired sprinkle with star sprinkles, pressing them gently into the warm cookie.
Notes
I prefer using red food color gel instead of liquid. It produces a more vibrant red color, and you won’t need to use as much.
*Be careful to not over bake these. There is a slightly larger amount of flour in these to ensure thickness, but if you bake them too long, they will get very firm. The cookies might even seem under-baked when you remove them from the oven. This is fine.
Nutrition
- Serving Size: 1 cookie
- Calories: 179
- Sugar: 14.7 g
- Sodium: 105 mg
- Fat: 9 g
- Carbohydrates: 23.5 g
- Protein: 2.4 g
- Cholesterol: 23.9 mg


Super fun recipe and easy to prepare. The author has done a great job explaining the process. My grandkids loved these! Shelly, thanks for another terrific recipe !!
So glad you enjoyed these!
These were fantastic and looked great! I chilled my dough, so they turned out soft and fluffy, just like I like them. This will be my new chocolate chip cookie recipe! Better than Tollhouse! I used regular butter and baked them about 8-9 mins. Also, I used liquid food color, and they aren’t quite as bright as yours, but they still look very festive.
Everyone loved them
This is a difficult recipe. My cookies are
Spreading and I followed the recipe to a t. I did mix it a lot and have to use a ton of food coloring to get anywhere near the red and blue you have. I suspect my dough is way over mixed. Color is a dark pink and light blue the dough is not white like yours appears to be in it’s undyed portions but I figured that would be the case. Had to bake about 15 minutes. I love this concept it is not working for me though.
I use a red food gel coloring to achieve a true red without having to use a ton of food coloring. I have found that the gels deliver a better result. I am guessing that’s where you ran into the problem!
It may be helpful to write this in your notes or list of ingredients section so the cookies come out the same as yours. Cookies are so bright and beautiful.
These were actually very easy to make and turned out yummy! I didn’t end up with large cookies because I was worried they might run but they held their size. I used drops of food coloring and it did turn out a bit pastel like but still a success!
We made these to send out with our weekly meals for our senior citizens – they came out great !
So glad you enjoyed these!
is this cookie recipe good for mailing?
Sure!
I didn’t use your recipe for cookie dough, but for inspiration using my much loved recipe…so happy how they came out!
They look great!!!
Hi Shelly! I’m making these now and they are spreading and won’t keep their shape? I tried chilling the dough and still spreading, any tip?
That’s very strange, I’ve never had that issue… could be a few things causing the cookies to spread, but since you have the dough already done I would recommend to troubleshoot: baking them at a slightly higher temp, like 375°F, and taking them out as soon as they start to set up at the edges, 7-8 minutes. If they still spread as soon as they come out of the oven and are warm use a spatula to press the edges back and reform them. Hope this helps!
Made these in a jelly roll pan without the food coloring for a quick version. Baked at 350 for 25 minutes and they came out great!