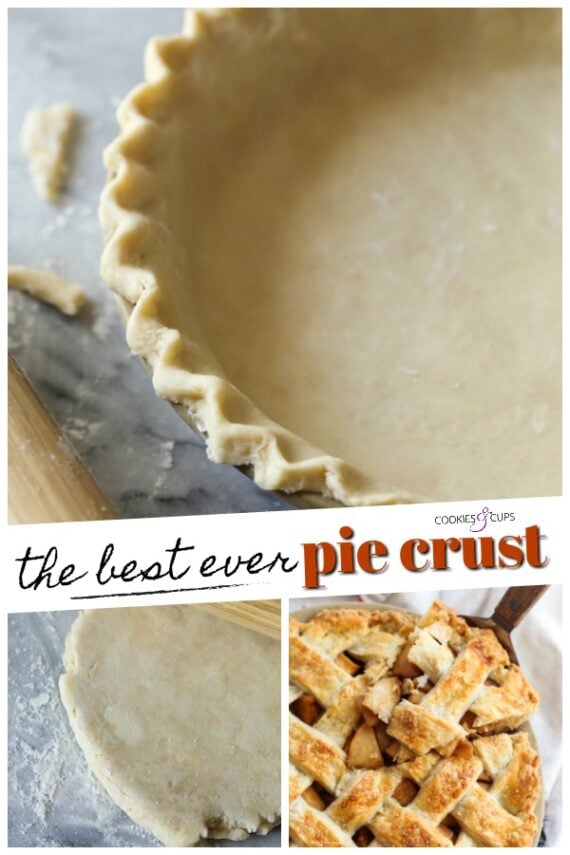
This Homemade Pie Crust Recipe is buttery, flaky and my tried and true favorite. Today I’m sharing all my foolproof tips and tricks to show you how easy making pie crust from scratch can be.
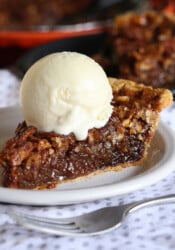
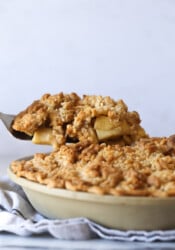
You can use this pie crust recipes for all kinds of delicious pies, including my favorite recipe for perfect apple pie or my pecan pie!

The Best Homemade Pie Crust for All Kinds of Pies
I have said many times on this site that pie making isn’t my favorite (unless it’s Pecan Pie, and for that I make an exception!) Up until about 5 years ago I wasn’t even truly confident in making pie crust from scratch. I would sub in a graham cracker crust wherever I could…not that there’s anything wrong with that, but the two aren’t always interchangeable. So I would stress about making them, or I would buy pre-made crusts…which are fine in a pinch, but they just aren’t the same as homemade.
Then one day I decided to end the drama. It’s a pie crust, which is really only a few ingredients and few easy steps. I dove into different pie crust recipes and tinkered around with the best way to make what I felt would be the perfect pie crust. And guess what? Turns out making homemade pie crust isn’t as hard as I used to think it was. In fact, it is downright EASY if you have the right pie crust recipe.
So today I’m breaking it down for you. If I can do it, you can too.

My Buttery, Flaky Pie Crust Recipe
I won’t pretend there is only one way to do this. There are many variations on fats, liquids, techniques that will all work! My mom actually used vegetable oil in her pie crust and swore by that method! But after a few solid years of testing different recipes and methods, this all butter crust recipe is the one that I stand by. Not only is it easy, it tastes delicious.
What is better for pie crust, butter or shortening?
Besides all butter, I have found after some research and testing that the other most popular preferred method is a combo of butter and shortening. And honestly, both work great.
Here’s why I prefer butter in pie crusts:
- Butter just tastes better! Whenever I try a crust that is made with shortening, I can always tell because it leaves behind that oily mouth-feel, and I’m not about that. Butter is 80-85% fat content, while shortening is 100% fat.
- Butter makes flaky pie crusts. If butter is 80% fat, what’s the other 20%? Well, butter is about 15-20% water, which when that water evaporates as it bakes it turns to steam, which puffs up the layers in the dough creating a flaky crust! Science, man!
- But use cold butter! Butter is a little more finicky to work with because of the lower melting point, so the main trick here is to keep it COLD! You want little flecks of butter throughout the dough to create those tender flakes, and keeping the butter as cold as possible is what will help create that, which leads me to the next point…
Tips for making this easy pie crust recipe:
Perfect Pie Crust Tip 1: Keep Everything COLD!!
Not only should the butter be cold, the water that you use should also be cold…actually ICE WATER is best! I measure out my water for the recipe and pop in a few ice cubes to make sure it’s as cold as possible.
You can even chill your bowl if you want!
You can even use frozen butter if you’re in a warm climate. This is a great trick and works perfectly, because if you are trying to make an all butter pie crust in a humid or warm place the butter can soften up pretty quickly, so just pop it in the freezer 30-ish minutes before you’re going to make your crust.
Perfect Pie Crust Tip 2: Make Sure To Cube Your Butter!
This step is super important! You can chill the butter before or after cubing…OR BOTH! Cubing the butter before you add it into the flour mixture speeds up the entire process, which is what you want. Making your dough needs to be quick! Remember you want those little pockets of butter throughout the dough and that won’t happen if the butter is warm, it will all melt together.
Think of it like this…throw a whole stick of butter into a bowl and get out your pastry cutter…how much longer is it going to take you mashing that entire stick of butter up into small pieces VS. if the butter was already cubed? Makes sense, right?

What Type Of Flour Should You Use In Pie Crust?
I recommend using a high quality all purpose flour. I love Bob’s Red Mill Unbleached All Purpose Flour, but honestly, you can use whatever all purpose flour you have on hand and it will work!
You might ask why I don’t use pastry flour in my pie dough. I mean, I get the question because essentially a pie crust is a type of pastry. And when I tested pie crust with pastry flour, there is no denying that the crust was delicious and very tender, as pastry four has less protein than all purpose, BUT it didn’t hold up as a crust as well as the crust made with all purpose flour. If you are looking for a flaky, yet sturdy crust for your pie, I definitely recommend all purpose flour.

How To Roll Out A Pie Crust & Make it Look Pretty!
Rolling out a pie crust is pretty simple. Here are a few tips that I recommend for making a pie crust that doesn’t fall apart when you roll it out:
- Allow your dough to chill for at least an hour before rolling it out. I always recommend this step because it gives the gluten in the flour a chance to relax before you start stretching it out more. My goal is always a flaky crust and I find this step helps!
- Make sure your surface is lightly floured AND keep a few tablespoons of flour on hand to add more when you need it! As you roll out your dough, lightly flour the rolling pin as well as the rolling surface, to prevent sticking on the top! You can turn the dough as you roll to prevent sticking. There is nothing worse than getting everything rolled out perfectly only to have it stick to the counter!
- Roll your dough to about 1/8 – 1/4 inch thick. It honestly doesn’t have to be exact, BUT I have made the mistake so many times rolling my crust too thin, which doesn’t create a very stable base for your pie. But also make sure it’s not too thick, because you want it to bake through all the way. This recipe makes the perfect amount for 2 circles of dough.
- Along with the thickness of the dough, you want to roll it out to measure 2- inches wider in diameter than a standard pie plate, OR 4 inches wider if you are using a deep dish pie plate. You need to make sure you have enough excess hangin over the edge to be able to crimp the crust’s edge!
- To transfer the dough to the plate from the rolling surface, fold it into halves or quarters to transfer into pan. If you’re a pie pro you can roll it around the rolling pin and use that technique, but I always have trouble doing that!
- If your pie dough cracks or tears DON’T WORRY!! Just wet your fingers with a little water and mold it back together.
- Once you have your pie dough in your pan, trim the edges with a pairing knife leaving about an inch overhanging. Save extra dough if you want to create dough decorations like leaves or stars.
Can You Freeze Pie Crust Dough?
Absolutely! Freezing dough is a great way to plan ahead. You can freeze the dough in a ball, or you can freeze it pressed into the pie plate. You can even freeze it already baked, if you have blind baked a crust and are planning on filling it later.
More Tips & Tricks for the Perfect Pie Crust Every Time
- Don’t grease your pie plate. The dough has enough fat that you should have no problem with sticking!
- I like to use a 2 teaspoons of vinegar in my pie crust. Why do you put vinegar in pie crust? Because the vinegar helps prevent the formation of gluten to make a tender crust.
- Don’t worry too much about the crust looking pretty. Trust me, this was a huge hang-up of mine for a LONG time. It would prevent me from even making pie, because they always came out kind of ugly! BUT here’s the deal…pie is supposed to be rustic. It’s fine. Unless you’re entering a pie contest how it looks REALLY isn’t a huge deal.
Also, Invest in a Pastry Cutter (Pastry Blender)
This is one of those annoying kitchen tools that always gets stuck in your drawer and takes up space. I know, it’s annoying. And trust me, my pastry cutter is pretty mangled, but it does the job. It’s just the easiest tool to use to cut butter into a pie dough. They’re cheap, so it’s not a huge investment, and I will tell you they are useful in other ways beyond pie crust! We use ours for making guacamole! haha!
BUT if you don’t have a pastry cutter and you’re not planning on buying one, here are a few option s of things you can use in its place:
- A Fork. This will take a little longer, and the tines are spaced closer together than a pastry blender, but it will work.
- Food Processor. I know lots of folks who swear by a food processor when making pie dough. It’s actually a great idea, because you pulse it until it’s done and you have less chance of overworking your ingredients. I’m just lazy and hate pulling my food processor out!
- Butter Knives. Two butter knives can do the trick as well, it’s just a little bit more tricky!
- A Cheese Grater. I only recommend using a cheese grater if you freeze your butter. Otherwise it gets a little mushy!
- You Hands. This is a last resort because the heat of your hands warms the butter pretty quickly. So if this is what you plan on doing, again, freeze your butter!

How To Blind Bake a Pie Crust
For those of you who are making a pie that features a no-bake filling, you will want to pre-bake your crust, or “blind bake” it. This is super easy, let’s talk about how…
- You will follow all the steps in the recipe as stated.
- Place one of the rolled out dough circles into a pie plate, pinching the edges to form a crust. Using a fork, poke holes evenly on the bottom of the crust to help prevent bubbles. Place the crust in the freezer for at least 30 minutes. This will prevent your crust from shrinking as it’s baked.
- Preheat the oven to 375°F.
- Cut a circle of parchment paper out as large as you rolled your crust, and place it into the frozen crust. Top the parchment paper with pie weights or dried beans.This mimics a filling of a pie as you bake it, holding it into place and preventing bubbles in your crust, along with the pricked holes you made with the fork.
- Bake the crust for 15 minutes. Remove the crust from the oven and remove the weights and the parchment paper. Place the crust back in the oven for an additional 10- 15 minutes until the crust is golden. If the crust begins to brown too much, use a pie crust shield or aluminum foil to cover the crust and continue baking.
What is a Pie Shield?
If you plan on baking pie, a pie shield will be your best friend. I went for years without one, scraping together aluminum foil to create a makeshift shield to prevent my pie crust from browning too much.
BUT the little handy pie shield invention is a SUPER simple tool to make sure your crust doesn’t get too brown. They’re cheap, and so worth it in my opinion!
Here’s the link to the one I have if you’re interested. I know they make silicone ones now, and I am sure they work great too! Just make sure you’re buying the right size for the pie plate you have!
Print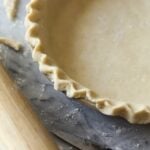
Homemade Pie Crust Recipe
- Prep Time: 10 minutes
- Cook Time: 0 minutes
- Total Time: 10 minutes
- Yield: serves 10 1x
- Category: Pie
- Method: Oven
- Cuisine: Dessert
Description
This Homemade Pie Crust Recipe is buttery, flaky and my tried and true favorite. Today I’m sharing all my foolproof tips and tricks to show you how easy making pie crust from scratch can be.
Ingredients
- 2 1/2 cups all purpose flour
- 1 tablespoon granulated sugar
- 1 teaspoon kosher salt
- 1 cup cold butter, cubed
- 2 teaspoons apple cider vinegar
- 1/2 cup ice water
Instructions
- In a large metal bowl whisk together the flour, sugar and salt.
- Add the cold cubed butter into the flour mixture and using a pastry cutter combine the butter into the flour until it resembles very coarse sand. If you have some larger pieces of butter this is totally fine.
- Add in the vinegar and ice water and stir with a wooden spoon until it becomes too difficult, at that point use your hands working quickly to knead the dough until it holds together. It should not be sticky, however if the dough is too dry or crumbles apart add 1 tablespoon more water at a time until the dough holds together.
- Divide the dough in half and form each portion into a flat circle. Wrap each dough with plastic wrap and refrigerate for at least an hour, or up to 3 days.
- When you are ready to use the dough, roll the dough out 1/8 – 1/4- inch thick into an 12- inch circle on a lightly floured surface using a rolling pin, if using a standard 9- inch pie plate.
- Fold or quarter the dough and carefully place into a pie plate. Press it lightly into the dish, and trim the edges of the crust, leaving about 1- inch overhanging. Crimp the edges of the crust using your fingers.
- Fill your pie with desired filing.
- Roll out the remaining dough as you did before for a top crust, if the recipe requires. Place the dough on top of the pie and crimp the edges to seal.
- Follow the baking instructions according to the pie recipe you are using. Typically a fruit pie will bake at 375°F for 45-50 minutes.
How To Blind Bake a Pie Crust
- Follow steps 1-5. Place the pie crust into the freezer for at least 30- minutes.
- If you are pre- baking your crust: Place the rolled out dough into a pie dish, pinching the edges to form a crust. Using a fork, poke holes evenly on the bottom of the crust to help prevent bubbles. Place the crust in the freezer for at least 30 minutes.
- Preheat the oven to 375°F.
- Cut a circle of parchment paper out as large as you rolled your crust, and place it into the frozen crust. Top the parchment paper with pie weights or dried beans. This mimics a filling of a pie as you bake it, holding it into place and preventing bubbles in your crust, along with the pricked holes you made with the fork.
- Bake the crust for 15 minutes. Remove the crust from the oven and remove the weights and the parchment paper. Place the crust back in the oven for an additional 10- 15 minutes until the crust is golden. If the crust begins to brown too much, use a pie crust shield or aluminum foil to cover the crust and continue baking.
Notes
Refrigerate unbaked dough airtight for up to 3 days, or freeze for up to a month.
Nutrition
- Serving Size:
- Calories: 272
- Sugar: 1.9 g
- Sodium: 235.8 mg
- Fat: 19.2 g
- Carbohydrates: 23.4 g
- Protein: 4.2 g
- Cholesterol: 48.8 mg
Want To Save This Recipe?
Find more recipes like this:


WOW! This is my first time ever making pie crust, I wanted to use it for my peach cobbler and this was such as success and oh so delicious! The entire thing was gone in minutes! This recipe is a keeper!
Love hearing that you had success!! Great pictures!
How much butter should I use if all I have is salted butter?
I use salted butter in my recipe 🙂
I just made this crust for my first ever apple pie. I skip the apple cider vinegar turn out perfect. I put first crust on the bottom of the pie pan then I add filling then I put other crust for top press the edges with fork and put it in the oven for 400f for 40 minutes the crust was crispy and golden brown not burn at all. My husband loved it
I’ve tried other pie crust recipes and always failed at it, but this is the first recipe that actually worked for me! I was able to roll the dough out into a perfect thin crust which tasted delicious. Thank you!!
I cook a LOT but I never bake (my wife does all the baking but never cooks). I just made my first ever pumpkin pie with this crust and it was easy and came out great! I highly recommend it.
Thanks so much Jim for your feedback!! Glad this worked for you!
I was looking to try a new pie crust recipe this Thanksgiving and the promise of buttery flavor caught my attention and so I tried it. Unfortunately I have to say this recipe is not a pie crust. The end result is similar to a cobbler crust or a bread. It puffed like a bread rather than flake like a pie crust, and I did follow the recipe exactly using the chilled butter, the ice water, and refrigerating my dough prior to rolling it out. Had I been making apple cobbler this recipe would have been fine but it was a disappointment as a crust for my apple pie. If you plan to make this recipe just be aware that it is nothing like a traditional pie crust.
Well if this recipe is so bad then I would like to know what you recipe is that is so much better.
Did you use baking powder instead of soda? That could have done it
I agree, I made this crust for a lemon Meringue Pie and it was greasy and crunchy like a cookie. Will not be using this recipe again.
I was always afraid of pie crust in the past, but I decided to bake a pie for Thanksgiving last year and gave this recipe a go. O my! I received so many compliments and was asked to bake pies for every special occasion thereafter. I since have used this recipe, turning out so beautifully and flaky each time! Shelly provides simple, informative, and easy-to-understand instructions which I highly appreciate as an amateur baker. The picture I have included was the pie I baked for this years (2020) Thanksgiving and let me say, it surely made this year a little bit better! Thank you!
Thank you so much for the review and I LOVE the picture!!
I don’t know what happened but my crusts didn’t turn out good at all, maybe I over floured ? When I baked them they shrunk so much as well. These are my 1st pie crusts so I didn’t have any experience to fall back on. Next time I’m going straight up store bought !
I made your crust for pumpkin pies. Crust looked beautiful, nice & brown. Pumpkin mixture was fully cooked, but when I sliced the pie the crust was doughy and under cooked. Should I have precooked the shells?
This recipe was great. My pumpkin pie turned out perfectly. I cooked the pie crust for 10 minutes then covered the edges with strips of foil before I put in the filling. I didn’t take the foil off until the pie was baked. The edges came out perfectly and usually they burn.