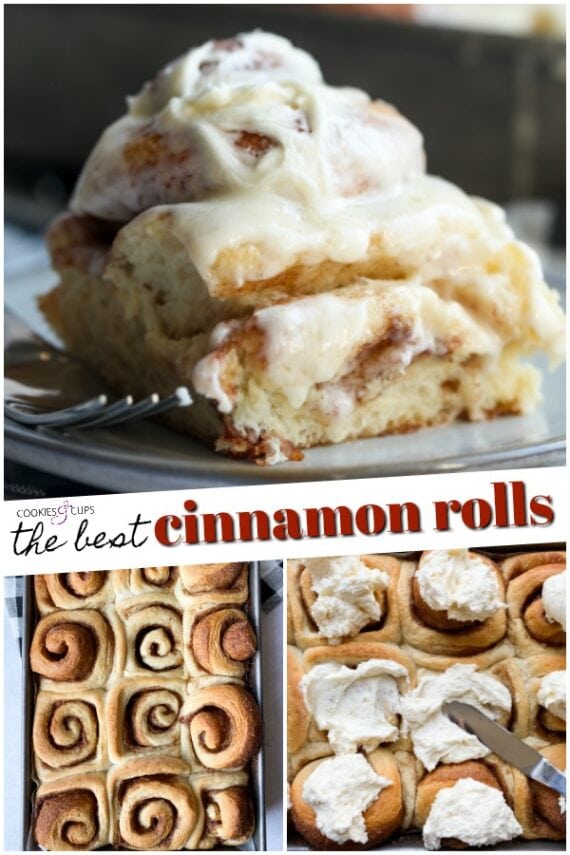
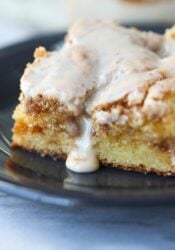
This is my tried-and-true recipe for the best cinnamon rolls ever! My favorite homemade cinnamon rolls are gooey, soft, filled with buttery cinnamon sugar, and smothered with creamy vanilla frosting. Best of all, they’re easy to make from scratch with instant yeast and pantry staples, with a quick rising time.

The holidays are here, and cozy baking recipes are in order. Starting with my favorite, best-ever, never-fail homemade cinnamon rolls recipe! If you’ve ever shied away from baking cinnamon rolls from scratch, THIS is your recipe. I use instant yeast, so the rising time is quick. These classic cinnamon rolls come out perfectly crisp outside and ooey-gooey in the middle, filled with rich cinnamon sugar flavor.
After today, you’ll never be tempted to crack open a can of refrigerated cinnamon rolls again (unless it’s to make TikTok cinnamon rolls, of course).
If you really want to be indulgent about it, you can do as my mom does and pour melted butter over the baked rolls before you frost them. Over the top? Yes. Genius? Also yes.
Nothing Tastes Better Than Homemade Cinnamon Rolls!
- Quick rising time. Unlike active dry yeast, which requires activating and a longer rise time, instant yeast cuts that time in half! You mix it right into the dough with the other ingredients. If you’re new to baking with yeast, these quick-rise cinnamon rolls are very forgiving.
- Fluffy outside, gooey inside. The perfect cinnamon bun is thick and soft, and golden brown on the edges. When you pull it apart, you want just plenty of that ooey cinnamon filling! That’s exactly what you get with this bakery-style cinnamon rolls recipe.
- Perfect for weekend brunches. Whether I’m baking these on a Sunday morning or serving them for a holiday brunch, these cinnamon rolls are always a crowd-pleaser.

Ingredients You’ll Need
These are the ingredients you’ll need to make big, fluffy, bakery-style cinnamon rolls at home. Scroll to the recipe card for the printable ingredient amounts and recipe details.
- All-Purpose Flour – The key to moist, tender cinnamon roll dough is to avoid overmeasuring the flour, which can make them dry. Measure the flour using the spoon and sweep method. Spoon the flour into your measuring cup, and level off the cup with a knife. Don’t scoop from the bag, or you’ll end up with too much.
- Rapid-Rise Yeast – My favorite brand is Fleischmann’s® RapidRise Yeast. Check the expiration date on your yeast packet to make sure it’s as fresh as possible.
- Sugar – Regular granulated sugar works best here.
- Water and Milk – I like to use both, since the milk makes the cinnamon rolls extra soft and flavorful.
- Butter – Cut the butter for the cinnamon roll dough into cubes.
- Egg – Bring the egg to room temperature if you think of it.
Cinnamon Filling
- Sugar – This can be granulated sugar or brown sugar, or a mix of both.
- Cinnamon – You can also flavor your filling with different spices, like nutmeg, cardamom, and pumpkin pie spice. You can also add in raisins, chopped pecans, or diced apples, like I use in my caramel apple cinnamon rolls.
- Butter – Take your butter out of the fridge and let it get very soft before you start.
Rapid-Rise Yeast vs. Active Yeast
Using rapid-rise or instant yeast in this recipe is great for a few reasons. You only need one (short) rise time, and you don’t need to hydrate (or bloom) the yeast in warm water or milk before you start.
Waiting for the dough to rise can be a guessing game if you are new to baking with yeast, but the process is much quicker with instant yeast. Your dough will double in about an hour, compared to a longer, sometimes overnight rise with active yeast.
You can make this recipe with active dry yeast at a 1:1 ratio. The only difference is that you will need to allow for a longer rise time. This dough recipe is very forgiving, so no need to double-rise or “bloom” the yeast. More rise time is all you’ll need.
How To Make Cinnamon Rolls From Scratch
I’ve written out full, detailed instructions in the recipe card, but I wanted to include the steps with photos below so you can visualize making your cinnamon rolls. Remember, even if they aren’t perfect, they’ll still be delicious!
Make the Dough
- Combine the dry ingredients. Slowly mix 2 cups of flour with the sugar, yeast, and salt in the bowl of your stand mixer.
- Warm up the other ingredients. Next, add the water, milk, and butter to a microwave-safe bowl. Heat in short increments until the temperature reaches between 120°-130°F. The butter might not be fully melted, but that’s OK.
- Make the dough. Add the butter mixture to the bowl with the dry ingredients, followed by the egg. Beat for 2 minutes, then add 2 more cups of flour. Beat the dough on high speed for another 2 minutes, then reduce the speed and slowly add more flour until the dough forms a ball.
- Knead the dough. Now, turn the dough out on a floured surface and knead it for 6-8 minutes until the dough is smooth and elastic. If you press it lightly with your finger, it should spring back. Another option is to knead the dough using the dough hook in your stand mixer.
- Rest the dough. Lastly, cover the dough with a clean dish towel and leave it to rest for 10 minutes.
Fill, Roll, and Cut the Cinnamon Rolls
With your dough ready, follow the steps below to get your cinnamon rolls ready to rise and bake.

- Make the filling. Stir together the cinnamon sugar in a bowl.
- Roll out the dough. Now, use a rolling pin to roll the cinnamon roll dough out into a 15×10-inch rectangle. This doesn’t have to be exact.
- Add the filling. Spread softened butter evenly over the dough. Then, sprinkle the cinnamon sugar over the butter.
- Roll the dough into a log. Starting with the long sides, tightly roll the dough up around the filling. Pinch the seams to seal.
- Cut the rolls. Using a sharp knife, slice the log into 12 equal pieces. Some bakers prefer to cut their cinnamon rolls with unflavored dental floss or thread, because it doesn’t “squish” the dough like the pressure of a knife does. Feel free to use floss for cleaner edges!
- Let the cinnamon rolls rise. Grease and line a 9×13-inch baking dish, and arrange the rolls evenly inside the pan. Cover the rolls with a towel again, and let them rise in a warm location for 1 hour, or until doubled in size.
Bake and Frost the Rolls
A lot of cinnamon roll recipes use cream cheese frosting, but I love mine topped with classic vanilla frosting. I include a version of that recipe in the recipe card. If you prefer a cream cheese frosting, you can borrow the recipe from my carrot cake!

- Bake the rolls. Preheat the oven to 350°F. Afterward, uncover and bake your cinnamon rolls for 25-30 minutes, or until they’re golden brown on top. Cool the rolls on a wire rack for 20 minutes before you frost them.
- Make the frosting. Beat butter and powdered sugar together, then add milk and vanilla extract. Mix until the frosting is creamy and smooth.
- Frost the cinnamon rolls. Spread the frosting over the rolls while they’re still warm.
Tips for the Best Cinnamon Rolls
- Adjust the amount of flour. The recipe calls for a range of flour, 5-6 cups. You will probably need closer to 5 cups, but you want to have extra on hand in case your dough seems too sticky, and also to flour your work surface. You want to add just enough flour that the dough forms a ball and is elastic, but not too sticky.
- Knead by hand, or use the mixer. You can use your dough hook to knead the dough in the bowl of a stand mixer, OR you can use your hands. Whichever you prefer.
- Your rectangle doesn’t need to be exact. Don’t get too hung up on the size you roll your dough out. I’ve given the dimensions 15×10, but if it’s a little larger than that, it’s fine.
- What if you get more than 12 rolls out of your dough? This could happen because you cut your rolls a little smaller or roll your dough out a little larger. Just bake them all! You might need to bake additional rolls in a different pan, because in my experience, 12 is the max you can fit in a 9×13-inch pan.
- Use the proof setting. Some new ovens have a “Proof” setting. I have found this to be an AMAZING feature, and if you’re lucky enough to have it, use it!
- Let the dough rise somewhere warm. If your kitchen is cool or drafty, heat your oven to 200°F when you first start mixing the dough. As soon as the oven comes to temperature, switch it off. Finish making your cinnamon rolls, cover them as directed, and place the pan in the warm oven. The temperature will have dropped by this point, leaving it only slightly warm, which is the perfect place for your dough to rise!

Make Ahead Option
This recipe can absolutely be made in advance. It’s especially great for holidays and for entertaining. The easiest way to get a head start on breakfast is to prepare the cinnamon rolls and let them rise overnight.
- Arrange your cinnamon rolls in the pan, and then cover them tightly with plastic wrap.
- Place the pan in the refrigerator to rise slowly overnight.
This is a great method to use if you want to prep ahead! The next morning, pull your pan out of the fridge and preheat your oven. Remove the plastic wrap and bake as directed.

How to Store
- Refrigerate. Store the frosted cinnamon rolls in an airtight container in the fridge for up to 3 days. The unfrosted rolls are fine to store at room temperature for up to 2 days.
- Reheat. Warm up your homemade cinnamon rolls in the oven or in the microwave.
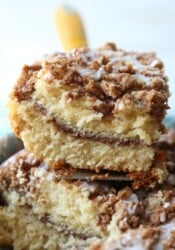
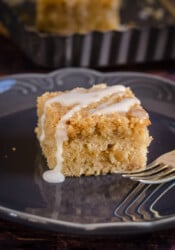
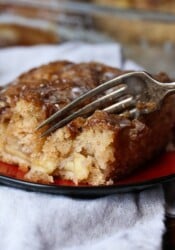
More Cinnamon Rolls Recipes

Homemade Cinnamon Rolls
- Prep Time: 1 hour 40 minutes
- Cook Time: 25 minutes
- Total Time: 2 hours 5 minutes
- Yield: 12 rolls 1x
- Category: Bread
- Method: Oven
- Cuisine: Breakfast
Description
These are the best homemade cinnamon rolls ever! Gooey, soft, filled with buttery cinnamon sugar, and smothered with creamy vanilla frosting. They’re easy to make from scratch with instant yeast!
Ingredients
For the Dough
- 5–6 cups all-purpose flour
- 1/3 cup granulated sugar
- 2 (1/4- ounce) packets Fleischmann’s® RapidRise Yeast
- 1 teaspoon kosher salt
- 1 cup water
- 1/2 cup milk
- 6 tablespoons butter, cubed
- 1 large egg
Cinnamon Filling
- 1/2 cup granulated sugar
- 1 tablespoons ground cinnamon
- 6 tablespoons butter, very soft
Frosting
- 3/4 cup butter, room temperature
- 3 cups powdered sugar
- 2 tablespoons milk
- 1 teaspoon vanilla
Instructions
- Dough: In the bowl of your stand mixer fitted with the paddle attachment mix together 2 cups of flour, sugar, yeast, and salt on low speed until combined.
- Place the water, milk, and butter in a microwave safe bowl and heat in 25 second increments until the temperature reaches between 120°-130°F. Butter might not be melted, completely, which is fine. Add this to the flour mixture along with the egg and mix on medium speed for 2 minutes.
- Add 2 more cups of flour to the mixture, and mix on high speed for 2 minutes, scraping the sides of the bowl if necessary.
- Turn mixer to low and add in just enough remaining flour until the dough will form a ball.
- Lightly flour a clean surface knead the dough for 6-8 minutes, adding a little more flour as necessary while you are kneading until the dough is smooth, elastic and springs back when lightly pressed with 2 fingers. Alternately, you can do this step in your stand mixer fitted with the dough hook attachment.
- Cover the dough with a towel and let it rest for 10 minutes.
- Filling: In a medium bowl mix together the sugar and cinnamon for the filling. Set aside.
- Roll the dough out on a lightly floured surface into a 15×10- inch rectangle using a rolling pin. This doesn’t have to be exact.
- Spread the soft butter onto the rolled out dough evenly. Sprinkle with the cinnamon sugar mixture. Starting the with long sides, tightly roll up the dough, pinching the seams to seal.
- Using a sharp knife, dental floss, or thread to slice into 12 equal pieces. *some use dental floss or thread because it doesn’t “squish” the dough like the pressure of a knife does, creating precise edges.
- Line a 9×13 baking dish with parchment paper and coat with nonstick spray. Place the cinnamon rolls evenly into the pan, cover with a towel and allow to rise for 1 hour in a warm place, until doubled in size.
- Preheat oven to 350°F. Bake cinnamon rolls for 25-30 minutes, or until golden brown.
- Cool on a wire rack for at least 20 minutes.
- Frosting: Prepare frosting in the bowl of your stand mixer fitted with the paddle attachment. Mix the butter and powdered sugar together for 1 minute on medium speed. Add in the milk and vanilla and mix for another minute until creamy and smooth, scraping the sides of the bowl as necessary.
- Spread frosting onto rolls.
Notes
- Store airtight at room temperature for up to 3 days.
- You can also prepare the rolls overnight by completing steps 1-11, but instead of allowing the rolls to double in size in a warm place, cover and place in the refrigerator to rise overnight.
- Recipe adapted from breadworld.com
Nutrition
- Serving Size: 1 roll
- Calories: 559
- Sugar: 39.2 g
- Sodium: 210.3 mg
- Fat: 24 g
- Carbohydrates: 80.1 g
- Protein: 6.9 g
- Cholesterol: 76.8 mg


Made these buns today and they are devine, not to difficult to make, will defo make them again
Made them last week and they were delicious!!! The dough and icing were so good. I will absolutely be making them again and sharing with my family!
Yours turned out perfectly!!! Thank you for sharing your photo!
I made these Christmas Eve for Christmas morning. The dough was so easy to work with. For the filling I used half granulated sugar and half Brown sugar. (Also, I had one envelope rapid yeast and one regular!) I left the buns on the counter for about 20 minutes before baking in the morning. I have to say, these were easily the best cinnamon buns I’ve ever made… And I’ve tried many!! Thank you for this approachable recipe! It’s a favorite in our house already!!
Thank you so much and so glad you liked them!!
Can I use DRY ACTIVE YEAST instead of rapid rise?
Yes absolutely, but your rise time will be longer than listed 🙂 The Rapid Rise allows for a quick rise time, so you will need a few hours in a warm place for the rolls to double in size!
Hi! If I put the in the fridge overnight to bake in the morning, do I have to let the cone to room temperature before baking them? If not, do they need more baking time because they are cold? Sounds yummy, thanks for sharing!!
I like to bring them up to room temp before baking but you don’t have to! If you bake them from cold, I would add maybe 2 minutes to the bake time…not too much, but a little 🙂
Can I freeze the extra cinnamon rolls after I bake them? I shouldn’t eat 12 in 3 days even though I’d love to. Lol
Yes you can! Just tghaw at room temperature and then you can reheat them in the oven or microwave if you haven’t frosted them yet 🙂
How could I make this as a sticky caramel cinnamon roll as opposed to the frosting? Looks delish!
Make the cinnamon rolls as-is… and then top them with caramel and pecans while they are still warm 🙂
Have you tried making in a bread machine using the dough function? I have arthritic hands and manual kneading is an agony.
DO you have a stand mixer with a dough hook?
My Mom always made homemade yeast dinner rolls. She would allow them to rise the night before and then bake for a short time (did not allow them to brown). The next day, she would finish them in the oven right before the meal. Always perfect! Could I do that with this recipe?
Yes you could!
What about brown sugar in place of the white sugar for the filling?
absolutely!!
I really want to try this recipe, but definitely do not need a pan of 12 rolls in my house. How would you suggest halving this recipe since it calls for one egg?
You could use an egg substitute. I know 1/4 cup “Egg Beaters” = 1 egg, so you could use 2 tablespoons. I have never tried this method, but I don’t see why it wouldn’t work 🙂