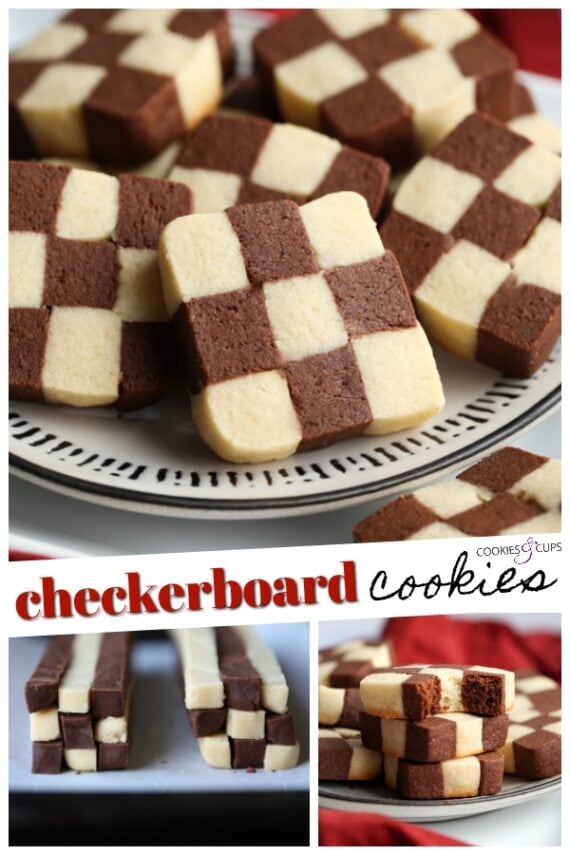
Checkerboard Cookies are buttery, whimsical butter cookies that are perfect for when you can’t decide if you want a chocolate or vanilla cookie! This is an easy cookie recipe that looks impressive, but is simple and fun to make!
I’m thrilled to announce I’m a 2019 Reynolds Kitchens Ambassador and will be partnering this year with them on some fun new recipes! Thank you for supporting the brands that make this website possible!
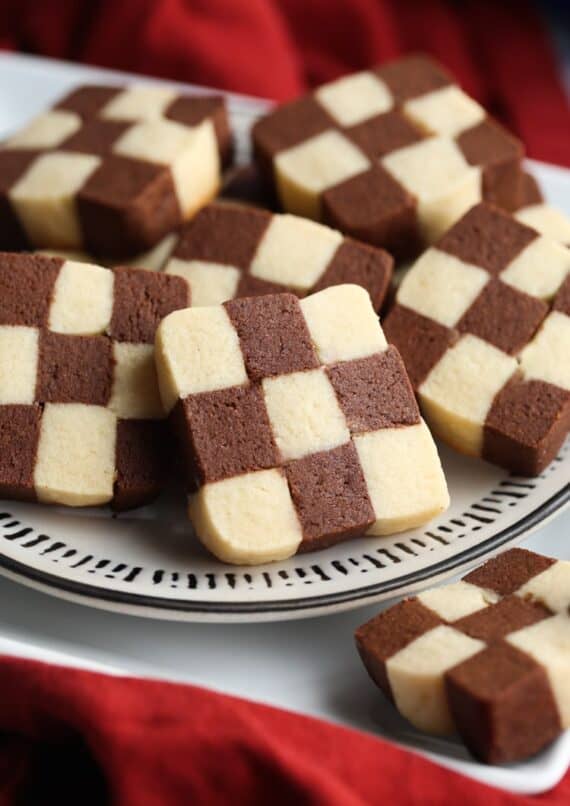
Checkerboard Cookies Will Look Great On Your Holiday Cookie Tray!
I am so excited to share today’s cookie recipe with you! Checkerboard Cookies are festive, fun to make, delicious, and PRETTY! Pretty much everything I look for in a cookie.
You might think this is complicated, or time consuming, but I am here to tell you it’s neither! It’s essentially a slice and bake cookie recipe that is pretty foolproof if you follow my steps. The dough is simple and the step by step process is very straightforward and actually fun to do. I even think this is a cookie recipe that is great to get your kids involved in making!

How To Make Checkerboard Cookies
Like I said, the process is easy, very easy to understand. Let me break down the steps for you!
- Make the dough for the cookies…just one dough for both flavors! That’s one thing I love about my recipe! Just divide the vanilla dough in half, removing the vanilla portion from the stand mixer. Add in some cocoa powder to the remaining dough and mix until the other half of dough is chocolate. It’s THAT easy!
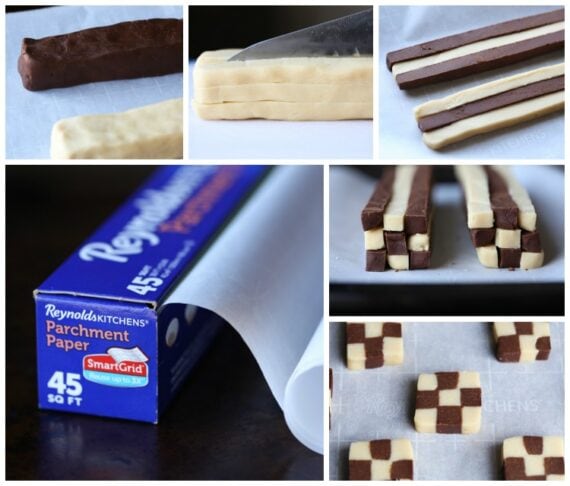
- Shape both portions of dough with your hands into square logs 2- inches in diameter and 6- inches in length and chill the dough for at least 30 minutes, so it’s easy to slice. IMPORTANT TIP: Be sure both logs are the same size. You will need them to be uniform in size for the next step.
- Once your dough is chilled, slice each log into 9 equal strips. Do this by slicing it into 3 long strips, then turn the dough 1/4- turn and slice it into 3 more even strips.
- To form the checkerboard pattern you lay 3 strips of dough in alternating flavors onto a cutting board. Top the 3 strips with 3 more alternating flavors. Repeat this one more time until you have a square with 9 strips (see photo below). Repeat with the remaining dough.
- Squeeze the logs together, careful to keep the square shape, but making sure the logs hold together. You don’t want gaps in between the strips.
- Place the logs back in the refrigerator to chill to make them easy to slice into cookies.
- Finally slice the dough logs into cookies and bake!
Why Do You Use Parchment Paper When You Bake Cookies?
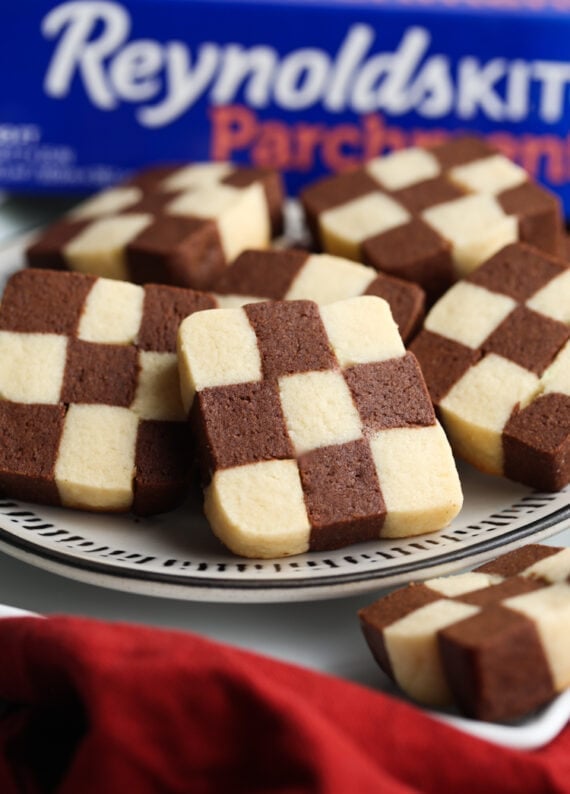
I always bake my cookies on parchment paper lined baking sheets. I find that it makes for easy clean up, no sticking, and evenly baked cookies. But I really love Reynolds Kitchens® Parchment Paper with Smart Grid® and here’s why:
- It comes with a built-in gridline pattern that enables you to easily cut the paper to perfectly fit any size pan. I love this feature because it takes the guess work out of making sure it fits the pan!
- The gridline is also fantastic because it makes it visually easy to spacing cookies out evenly for better results.
- And like I said above, parchment offers a non-stick cooking surface, easy clean-up AND Reynolds Kitchens® Parchment Paper is reusable up to 3 times and is compostable!
How Do Get The Perfect Tear With Parchment Paper?
Here’s a tip that I love and learned from my friends at Reynolds Kitchens:
Measure out your amount of parchment paper and then tuck the flap of the box back inside the box, holding the piece in place. NOW tear the paper along the serrated box on an angle. You will never get a jagged tear if you follow this trick!
Looking For Slice and Bake Cookie Recipes?
Print
Checkerboard Cookies
- Prep Time: 20 minutes
- Cook Time: 10 minutes
- Total Time: 30 minutes + chill time
- Yield: 24 cookies 1x
- Category: Cookies
- Method: Oven
- Cuisine: Dessert
Description
These extra cute cookies are easy to make and you get to enjoy a chocolate and vanilla cookie in one!
Ingredients
- 1 cup butter, room temperature
- 1 cup granulated sugar
- 1 egg, plus 1 egg yolk
- 1 teaspoon vanilla extract
- 1 1/2 teaspoons baking powder
- 1/2 teaspoon kosher salt
- 3 cups all purpose flour
- 1/3 cup unsweetened cocoa powder
Instructions
- In the bowl of your stand mixer fitted with the paddle attachment mix together the butter and sugar for 2 minutes.
- Add in the egg, the yolk, vanilla, baking powder, and salt and mix for 1 minute until smooth, scraping the sides of the bowl as necessary.
- Turn the mixer to low and add in the flour, mixing until just combined.
- Divide the dough in half, removing half from the mixing bowl.
- Add in the cocoa powder to the remaining dough in the mixing bowl and mix until incorporated.
- Form each dough into a squared off log, 2- inches tall and 6- inches long. Make sure both are the same size.
- Place dough on a baking sheet and cover with cling wrap. Place dough into the refrigerator to chill for at least 1 hour.
- Using a sharp knife slice the dough into thirds, longwise. Then turn the dough one turn and cut into thirds again. You will have 9 strips. Repeat the process with the other dough. You will have 18 strips total.
- Lay 1 piece of vanilla dough, one piece of chocolate, and another piece of vanilla on a flat surface next to each other. Top the 3 strips with alternating colors. Repeat this once more, so you have a square log. Press the dough strips together tightly, keeping the square shape. Repeat this with the remaining dough.
- Refrigerate again for at least 30 minutes.
- Preheat the oven to 350°F. Line a baking sheet with Reynolds Kitchens® Parchment Paper.
- Remove the dough from the refrigerator and slice into 1/4- inch pieces.
- Place the pieces on the prepared baking sheet.
- Bake for 9-10 minutes, or until set. Transfer to a wire rack to cool completely.
Notes
Store airtight for up to 5 days. Freeze airtight for up to 30 days
Nutrition
- Serving Size: 1 cookie
- Calories: 167
- Sugar: 8.4 g
- Sodium: 56.6 mg
- Fat: 8.4 g
- Carbohydrates: 21.3 g
- Protein: 2.4 g
- Cholesterol: 35.8 mg
Want To Save This Recipe?
Find more recipes like this:


Every year for april i make these cookies from another recipe but i lost that one.
I live in alberta and I tried making these. they where too dry I made it twice, exactly how you instructed but ig this recipe isn’t for me
It may have been to dry or hot out. That is the con of baking in summertime. All of the successful reviews were posted during wintertime, implying to me that they benefit from cooler or drier weather. I suggest you add either the whole second egg and have a slightly too eggy cookie or wait until winter to try again.
turned out really well
I tripled the batter and was so pleased at how great the cookies turned out. The cookies taste so rich but not too sweet. The best part is sharing with my friends and family. Thank you Shelly for the great recipe. I will make double the recipe today!!!
So glad you enjoyed them!
Can checkerboard cookies be made with vegan butter?
I don’t know
If vegan butter can be used as a butter subsitute in any other recipe it should be a non-issue for these. I used margarine and mine turned out fine.
How do you get the perfect square shape? Do you just use your fingers and press it? Thank you!
Yes, I form it with my hands.
I didn’t feel super confident to cut the logs into so many pieces. So, I did a simplified checkerboard and cut each log into 4 instead of 9. I didn’t mix the cocoa in good enough though and had streaks in my chocolate sides. They still tasted good though. I always screw up on presentation, but I always got full taste marks in foods class.
Do you use salted or unsalted butter?
I used salted, but you can use either.
Is the nutrition facts talking about one cookie or once cookie long cube? Because I did the math and one cookie should be about 100 calories not 167.
It’s one cookie. I have an automated nutrition fact generator. So it can vary based on how you slice your cookies or if your ingredients vary.
Good recipe. I like the flavor mix and the cookies are so pretty. Mine didn’t turn out quite as photo-worthy as yours but not too bad for a 1st timer 😉 I thought they were a fun cookie to try to make, not nearly as difficult as they look. Thanks for the recipe, would be fun to try with or without the cocoa for different holidays or even team colors!!! (I have pics of mine but wasn’t sure how to share them, sorry)
If you use Instagram post them there and tag me! I’d love to see them 🙂 Aren’t they fun to make? I’m sure they look fantastic!
They’re in the oven right now! The dough is delicious and I was able to make the checkerboard pretty even. Can’t wait to try the finished ones.