This simple Cheez-Its recipe is a homemade version of the classic cheddar cheese crackers! They’re fun to make and totally delicious. You won’t be able to stop eating them.
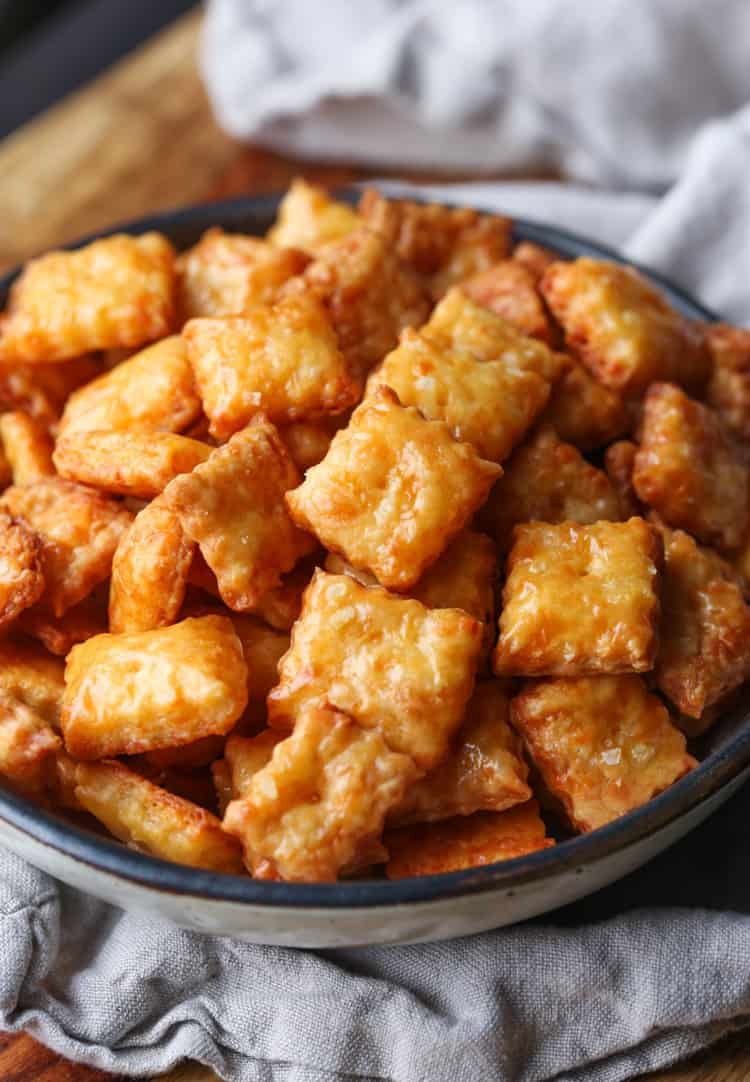
You might be thinking…WHY? Why do you need to MAKE Cheez-Its when the boxed originals are basically perfect? I kinda agree with you…and certainly I’m not making homemade cheese crackers every time my kids have a craving. BUT I will say that making Cheez-Its from scratch is pretty satisfying. Plus, it’s a nice change of pace from the norm, don’t you think?
Why I Love This Cheez-Its Recipe
- Compulsively munchable. These homemade crackers are just so unbelievably tasty. My family gets excited when I make these. (And I mean, I do too.)
- A perfect copycat. This recipe is amazingly spot on!
- Street cred. Making a snack that you know and love from scratch and have them turn out just like the original is pretty impressive. If you make homemade Cheez-Its you 100% will wow people.
- Easy! I PROMISE you these are easy. Like SO easy. They’re actually pretty fun to make, and would be a great recipe to get your kids involved with as well!
What Kind Of Cheese Do You Use?
I used sharp cheddar in my crackers, which is what gives them the flavor of the original. BUT you could TOTALLY get creative and use different kinds if cheeses. The firmer the cheese, the better for holding shape and texture. I wouldn’t recommend a really soft cheese like goat or brie. But here are a few ideas that would be fantastic:
- Colby Jack for a milder cheese flavor.
- Pepper Jack wold be great for a kick!
- Smoked Gouda would definitely make these flavor packed!
- A mix of Sharp Cheddar and Parmesan would make these even more flavorful!
Want to Add Seasonings?
Want to add some different flavors to your crackers? You absolutely 100% can do it! One of the best things about making homemade Cheez-Its is that you can completely customize the flavors. Here are some seasonings I like to play with:
- Garlic Powder
- Onion Powder
- Smoked Paprika
- Basil/Oregano/Thyme
- Chili Powder
- Cumin
- Taco Seasoning
How Do You Know When They’re Done Baking?
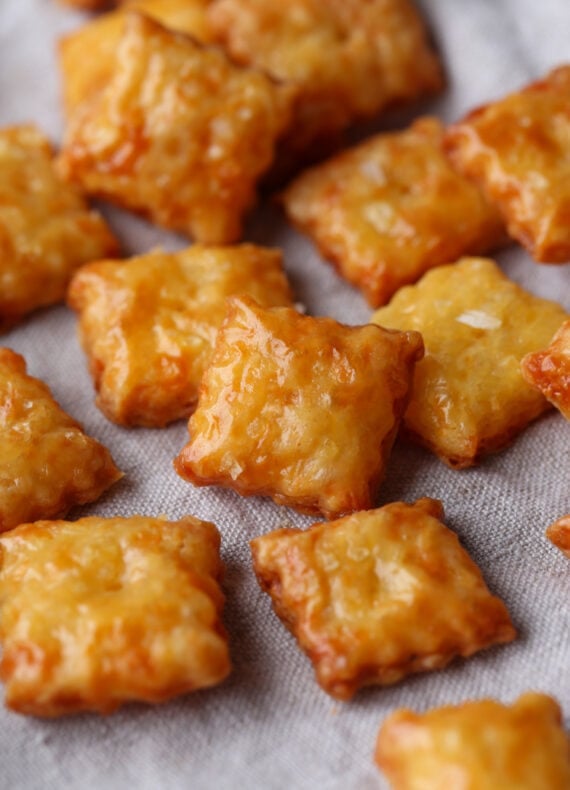
This is the important part! These crackers can go from done to overdone REAL quick… BUT you definitely don’t want to under-bake these, as they won’t have that crunch that we’re trying to achieve.
SO. You want them to be golden brown on both the top and the bottom. If only the bottoms brown they won’t be crunchy enough. But like I said, once the bottoms are browned wait until the tops area little toasty too…this is when the magic happens!
Ways to Use Homemade Cheez-Its
Besides ANYTIME or any spur of the moment snacking, here are a few specific times I might go the extra mile and make my own Homemade Cheez-Its:
- On a Charcuterie Board! How pretty would these be on a board next to some of your favorite fruits, meats, and cheeses?
- With Tomato Soup…or any kind of soup! These crackers would be amazing with a cozy bowl of soup, don’t you think?
- With a Glass of Wine. Have a happy hour planned? These would be super impressive next to a chilled bottle of rosé and a plate of fruit. Happy hour made easy!
- In your kid’s lunch box. If your one of those moms who packs the adorable bento box style lunches for your kids, these would be perfect!
More CopyCat Snack Recipes

Homemade Cheez-Its
- Prep Time: 30 minutes
- Cook Time: 13 minutes
- Total Time: 43 minutes + chill time
- Yield: 150 crackers 1x
- Category: Crackers
- Method: Oven
- Cuisine: Snack
Description
These easy homemade cheese crackers are fun to make and perfect for snacking!
Ingredients
- 8– ounces sharp cheddar cheese, grated
- 1/4 cup butter, cubed and room temperature
- 1 teaspoon kosher salt
- 1 cup all purpose flour
- 2 tablespoons cold water
Egg Wash
- 1 egg
- 1 egg yolk
- 1 tablespoon water
- 1/4 teaspoon kosher salt
- flaked sea salt (or kosher) for sprinkling
Instructions
- In the bowl of your stand mixer fitted with the paddle attachment mix the grated cheese, butter, and salt together on low speed until combined.
- Add in the flour and then the water and mix until the mixture resembles coarse crumbs. It will be crumbly, but should hold together when squeezed.
- Divide the mixture in half, forming both halves into a flat disc. Wrap in plastic wrap and refrigerate for 30 minutes.
- Preheat the oven to 350°F. Line a baking sheet with parchment paper and set aside.
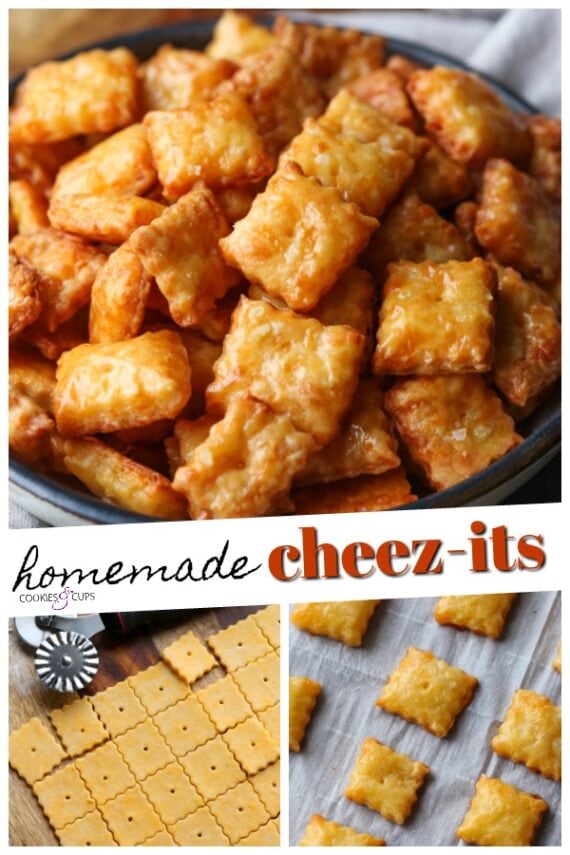
- Remove one disc from the refrigerator and using a rolling pin on a very lightly floured surface, roll the dough out to 1/8- inch thick. The edges will be jagged, this is normal.
- Using a pastry wheel or pizza cutter, cut the dough into 1- inch squares. Poke a small hole in the center of each using a toothpick or a skewer.
- Egg Wash: In a small bowl whisk together the egg, yolk, salt, and water. Using a pastry brush, brush the dough lightly with the egg wash. Sprinkle lightly with flaked sea salt or kosher salt.
- Place on the prepared baking sheet and bake for 13-15 minutes, until tops and bottoms are lightly golden, rotating the pan halfway through baking. Cool crackers on the baking sheet and then transfer to a container to serve or store.
- Repeat with the remaining dough.
Notes
Store airtight at room temperature for up to 3 days.
Nutrition
- Serving Size: 10 crackers
- Calories: 119
- Sugar: 0.1 g
- Sodium: 254.5 mg
- Fat: 8.2 g
- Carbohydrates: 6.8 g
- Protein: 4.4 g
- Cholesterol: 23.1 mg
Want To Save This Recipe?
PIN for later






Mine aren’t getting crispy, any ideas as to why? I followed your instructions to a T.
Can you make these if you don’t have stand mixer??
I don’t own a stand mixer, or a good hand mixer.Can you make the dough in a food processor, or would hand mixing work better?
I would probably mix it by hand!
it tastes amazing! it even works with gluten-free flour!!!
A great mini-project recipe! Dough was so easy to work with and they turned out great!
Really easy and they do taste just like cheez it’s. I might cut down the salt in the dough next time though.
Hello,
The recipe has an egg and an egg yolk. I read where you used the yolk, but where is the egg added in the recipe?
In step #7, the egg wash you mix the egg and the yolk together 🙂 There is a comma in between egg and yolk, probably easy to miss!!
its for the egg wash
Mmmm! I need to make these. I love cheez its. Sounds easy enough to make… And everything is “healthier” when homemade.
Oh my! These looks delish! How do you think these would do if you replaced the regular flour with almond flour to make them “keto”?
Ahh that’s a great question. I don’t ever bake with almond flour, as I have an allergy, and from the research I have done on baking with almond flour there doesn’t seem to be a standard conversion, and can vary recipe to recipe. I wish I could help more and if you try it, definitely report back with your results!
How about coconut flour?
I’ve never tried these with coconut flour. There isn’t a standard substitution for coconut flour as a replacement for all purpose. It varies recipe to recipe. Although coconut flour requires much less than all purpose, I’ve found 1/4 cup to 1/3 cup to 1 cup all purpose. But you do need to increase the egg, or binding agent. Sorry I couldn’t be more help!
it works perfectly with any type of flour!