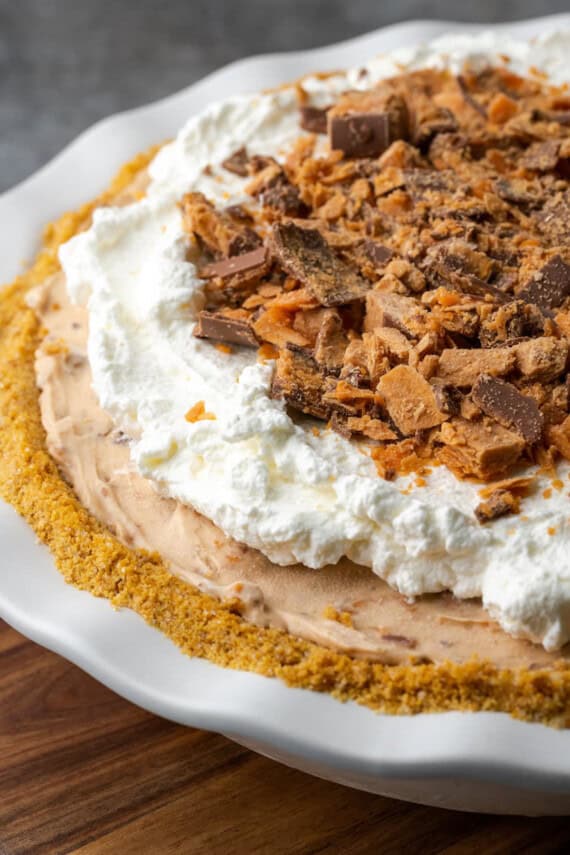
This Butterfinger Pie is an easy dessert that’s loaded with Butterfinger candy bars and silky, creamy no-bake pie filling. Treat yourself and the family to a slice of indulgent chocolate peanut butter pie!
Do you love Butterfinger candy and no-bake desserts? Try my No-Bake Butterfinger Caramel Bars, too!

The Ultimate Pie for Peanut Butter Lovers
Aren’t Butterfinger bars the best? Ask any peanut butter lover. All those layers of peanut butter crisp swaddled in milky chocolate. It’s a dream.
Do you know what’s even better than a single Butterfinger bar? A whole lot of them. Piled into this Butterfinger PIE!
My Butterfinger pie recipe is a classic (almost) no-bake dessert. This riff on candy pie uses my Best Graham Cracker Pie Crust, filled to the brim with a silky-smooth Butterfinger cream filling.
This peanut butter pie is rich and decadent, yet unbelievably light and fluffy. It’s filled with candy bar crunch and tons of peanut butter flavor. No wonder it disappears from the pie plate almost as fast as I can serve it!

What You’ll Need
Here you’ll find everything you need to make your own Butterfinger pie! Be sure to scroll further down to the recipe card for the full ingredient amounts:
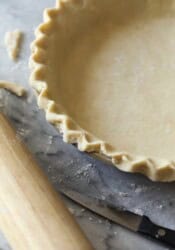
For the Graham Cracker Crust
- Graham Crackers: Use graham cracker crumbs, or crush up full graham cracker sheets to make the base for this simple pie crust.
- Butter: Salted or unsalted, and melted.
- Salt
- Sugar
For the Pie Filling
- Cream Cheese: Use the cream cheese that comes in blocks and not the spreadable tub kind! For a smooth filling (and also for easier mixing), take your cream cheese out of the fridge and let it come to room temperature.
- Creamy Peanut Butter: Your favorite brand of creamy peanut butter, like Jif or Skippy. Make sure you’re using the creamy kind for the creamiest results! See below.
- Powdered Sugar: You may also know it as confectioner’s sugar. This sweetens up the pie filling while the fine consistency keeps the texture smooth.
- Butterfinger Candy: I use the fun-sized version, but you could also use full-sized Butterfingers, as you’ll be chopping them up anyway.
- Cool Whip: For the ultimate fluff factor! Thaw out an 8 oz. tub of Cool Whip.
For the Garnish
- Whipping Cream: Use cold heavy whipping cream. To get the texture just right, leave it chilled right up until you use it. For best results, chill the bowl you’ll use for whipping, too!
- Powdered Sugar
- (More) Butterfinger Candy
What Kind of Peanut Butter is Best?
You’ll want to stick to the shelf-stable, creamy variety of peanut butter for this recipe. I definitely do not recommend natural peanut butter for Butterfinger pie. The excess oils in natural peanut butter can mess with the texture and cause things to separate. We’re after silky smooth, mousse-like pie filling here, friends!

How to Make Butterfinger Pie
Homemade Butterfinger pie is a 3-step wonder! It’s basically a matter of crust, pie filling, and garnish. The result is a real showstopper that you can have ready with minimal prep and a bit of chilling time:


Make the Crust: Get that oven preheated to 350°F. Meanwhile, mix your graham cracker crumbs, butter, sugar, and salt together in a bowl. Press the crust mixture into a 9-inch pie plate, then bake until golden. You’ll need to let your crust cool completely before you assemble the pie.


Prepare the Filling: Is that crust nice and cool? Good! Next, you’ll beat together the cream cheese, peanut butter, and powdered sugar. Fold in your chopped Butterfingers, followed by the Cool Whip.


Assemble: Plop the filling into your cooled crust and spread it evenly inside. Place the pie into the fridge to chill for at least 2 hours.


Garnish: Once the pie is chilled, you can serve it as is, but I prefer to pile on the garnish. Top your Butterfinger pie with extra Cool Whip or whipped cream, plus even more chopped Butterfinger candy.

Tips for Success
When it comes to the best Butterfinger pie, here are some tips that make this recipe a breeze:
- Use Store Bought Crust: The pie crust recipe is super simple. However, if you’re in a hurry, a store-bought, ready-made graham cracker crust will do just fine for a 100% no-bake dessert.
- Make the Crust In a Food Processor: If you have a blender or food processor on hand, making the pie crust is that much easier. Simply combine the crust ingredients in the processor and blend them together with a few quick pulses.
- Heat the Knife For Slicing: To keep the pie from sticking to the knife when you slice it, warm the knife first. Run it under hot water and wipe off the knife with a paper towel between slices to keep the pie edges nice and clean.

Variation Ideas
This Butterfinger pie is just as easy to customize as it is to make! Try out one or more of these yummy variation ideas:
- Use Homemade Whipped Cream: Cool Whip is a fuss-free shortcut to use in the pie filling. Of course, if you’re whipping cream from scratch for the garnish, feel free to make extra homemade whipped cream to use in the filling as well. As mentioned earlier, make sure to use a chilled metal bowl and cold whipping cream for the best results.
- Use Different Candy: Can’t get your fingers on Butterfingers? This peanut butter pie turns out just as tasty made with another peanut butter candy, like Reese’s Cups. Or, try chopping up Snickers bars instead! If you’d prefer to leave the candy out altogether, you can always add chopped peanuts instead.
- Use a Chocolate Crust: Sometimes, when I’m feeling extra indulgent, I’ll borrow the chocolate Oreo pie crust from my Chocolate Candy Pie recipe!
- Drizzle With Chocolate: For a fudgy twist, give your pie a drizzle of Pourable Chocolate Ganache. You can also try it with Homemade Caramel Sauce!
- Sprinkle With Sea Salt: Y’all know I love the addition of sea salt in desserts like cookies and peanut brittle. Why not sprinkle the top of this Butterfinger pie with sea salt for a delicious sweet and salty combo?
- Use Chunky Peanut Butter: I’m a fan of the ultra-smooth, mousse-y filling in this recipe. But if you’re after something with more crunch, go right ahead and use shelf-stable chunky peanut butter instead!
- Add Crushed Cookies: Take inspiration from my Nutter Butter Pie and toss in crushed peanut butter cookies!
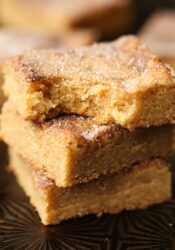
- Use a Square Pan: Make no-bake Butterfinger pie bars in an 8×8-inch square baking dish. I recommend lining the pan with foil and giving it a coating of cooking spray beforehand.

Storage Instructions
Store your pie chilled in the fridge for up to 3 days. Make sure you’re sealing your Butterfinger pie in an airtight container or wrapping it tightly in plastic wrap to keep the flavors intact.
Can I Freeze This?
If you make your pie with Cool Whip, it can be frozen for up to 1 month. Store the pie airtight in a freezer-safe container, or wrap it tightly in plastic wrap. Let it sit out for a few minutes when you’re ready to serve it, to soften it up again.
Note that Butterfinger pie that’s made with classic homemade whipped cream, however, will not freeze well as the whipped cream may separate once it’s thawed.
Print
Butterfinger Pie
- Prep Time: 20 minutes
- Cook Time: 8 minutes
- Total Time: 28 minutes
- Yield: 10 slices 1x
- Category: Dessert
- Method: Oven
- Cuisine: American
Description
This creamy Butterfinger Pie is an easy dessert recipe loaded with Butterfinger candy bars inside a creamy peanut butter pie filling.
Ingredients
For the Graham Cracker Crust:
- 2 cups graham cracker crumbs (about 15 full graham cracker sheets)
- 1/2 cup butter, melted
- 1/2 teaspoon kosher salt
- 1/3 cup granulated sugar
For the Pie Filling:
- 8 ounces cream cheese, room temperature
- 1/2 cup creamy peanut butter
- 1/3 cup powdered sugar
- 1 (11.5 ounce) bag Fun Sized Butterfinger, chopped
- 1 (8 ounce) tub Cool Whip, thawed
Garnish (optional)
- 3/4 cup cold heavy whipping cream
- 2 tablespoons powdered sugar
- 4 (Fun Sized) Butterfinger candy bars, chopped
Instructions
- Graham Cracker Crust: Preheat oven to 350°F/175°C
- Combine graham cracker crumbs, butter, salt and sugar in a bowl and stir to combine. Press the mixture evenly in the bottom and up the sizes of a 9- inch deep dish pie plate. Bake for 7-9 minutes until lightly golden. Remove from the oven and allow the crust to cool completely.
- Make the Filling: In the bowl of the stand mixer fitted with the paddle attachment mix together the cream cheese, peanut butter and powdered sugar for 1-2 minutes until evenly mixed and smooth, scraping the sides of the bowl as necessary. Add in the chopped Butterfinger and mix until combined.
- Using a rubber spatula or set the mixer to the lowest speed, fold in the Cool Whip to the cream cheese mixture until just combined. Spread the mixture into the prepared crust and chill for at least 2 hours.
- Garnish: If desired when you are ready to serve the pie whip the heavy cream and the powdered sugar in the bowl of your stand mixer fitted with the whisk attachment for 1-2 minutes until stiff peaks form.
- Spread this on top of the pie and top with the chopped Butterfinger.
- Serve immediately.
Notes
- You can use homemade whipped cream in place of the Cool Whip.
- Store airtight, chilled for up to 3 days.
- Nutrition info includes garnish.
Nutrition
- Serving Size:
- Calories: 579
- Sugar: 38.6 g
- Sodium: 411 mg
- Fat: 36.9 g
- Carbohydrates: 58.5 g
- Protein: 8 g
- Cholesterol: 57.8 mg


Looks wonderful! I love Butterfinger. Does it stay crunchy if you don’t serve the pie for a day or so, or does it sort of melt into the filling?
The Butterfinger inside the filling will definitely soften up. But you can still get the crunch if you wait until the last minute to garnish it so all the Butterfingers on top will be fresh!
Was just looking for something new, easy and decadent for dinner with friends this weekend and this is definitely it. Looks so yummy…thank you!
I could not agree more with the annoyance that is grating cheese. I throw those blocks in the food processor every time to avoid that task!
This pie is out of control!
Shelly, this looks to die for!! I’ve always loved Butterfingers, so this dessert is right up my alley! 🙂
I haven’t had a Butterfinger in ages! I need to change that and I think this pie is the answer!
I am all about the Butterfinger research as well. So I’ll try this pie for the sake of science.
I would never turn down a slice of this fabulousness 🙂
Amazing! Best pie ever Shelly!!!