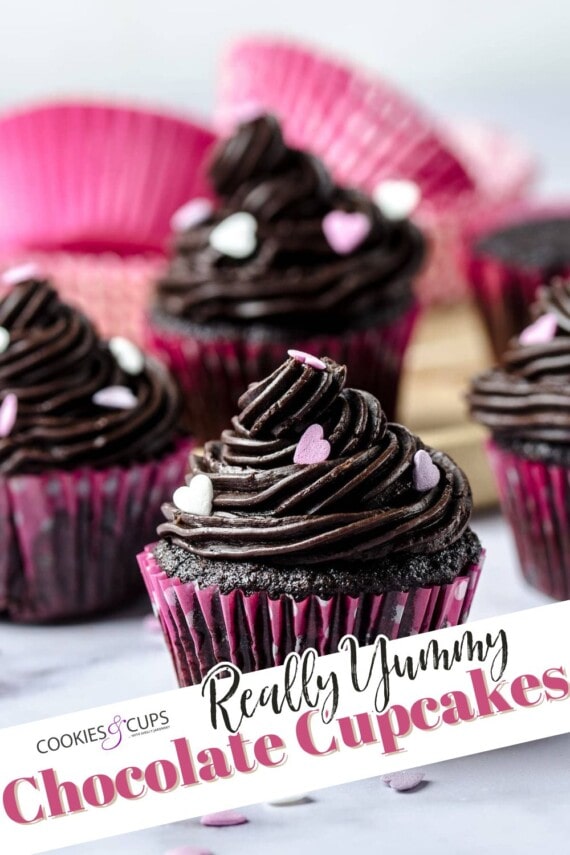
These are my best-ever chocolate cupcakes! This recipe makes soft and moist homemade chocolate cupcakes that are perfect for frosting and decorating. Finish them off with your favorite buttercream frosting!
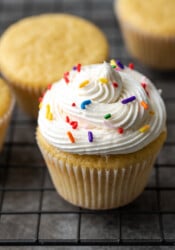
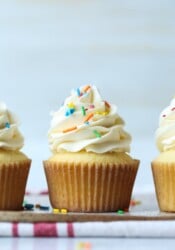
When it comes to homemade cupcakes, you can’t beat the classics like these fluffy chocolate cupcakes and my favorite vanilla cupcakes. I also love these easy strawberry cupcakes. Just add a swirl of buttercream!

My chocolate cupcakes are the only excuse I need to leave the boxed cake mix in the cupboard. This recipe makes perfect chocolate cupcakes that are super moist, tender, and fluffy. I’ve tasted a lot of cupcakes over the years, and I can safely say that these chocolate cupcakes might just be the best I’ve ever had. This is the only recipe you’ll need, and after today, it’s the only one you’ll want to bake!
Why You’ll Love This Chocolate Cupcakes Recipe
- Classic. These are classic chocolate cupcakes, no funny business. Rich, chocolatey, and topped with swirl of chocolate frosting, they’ll satisfy even the most ravenous chocoholics.
- Easy to make. I’m a firm believer that everyone should be able to make a batch of perfect chocolate cupcakes, no matter their skill level in the kitchen. This recipe delivers! I’m sharing all my best cupcake-baking tips and tricks along the way.
- Quick. With simple ingredients, a little mixing, and 30 minutes, you’ll have a batch of freshly baked chocolate cupcakes on your hands.

What You’ll Need
Here’s a quick look at what you’ll need to make perfect chocolate cupcakes from scratch. Be sure to scroll down to the recipe card for a printable ingredient list.
- Cocoa Powder: I use Hershey’s Special Dark Cocoa for this recipe, but you can use any natural, unsweetened cocoa powder you prefer.
- Flour – I recommend using all-purpose flour for the most consistent results.
- Buttermilk – Buttermilk adds loads of moisture and flavor to desserts like my Texas sheet cake and buttermilk brownies. It works the same magic in these chocolate cupcakes. If you don’t have buttermilk, make a homemade buttermilk substitute by adding 1 tablespoon of lemon juice or vinegar to a scant cup of milk. Let that sit for 5 minutes, stir, and you’re ready to go.
- Vegetable Oil – Or another neutral cooking oil, like canola oil. Using oil instead of butter yields extra soft, tender cakes and cupcakes.
- Vanilla – Make sure to use real vanilla extract or vanilla paste. You can also play around with different flavoring extracts for different flavor profiles. I think peppermint extract would taste great in these chocolate cupcakes!
- Granulated Sugar – You can also use brown sugar.
- Baking Soda, Baking Powder – I use both, plus salt, to give these cupcakes the best rise. Check the expiration dates on the packages to make sure that your leavening isn’t expired.
- Eggs – For best results, bring the eggs to room temperature.

How to Make the Best Chocolate Cupcakes
The ultimate chocolate cupcake is only a few short steps away, and I’ll walk you through them below. Scroll down to the recipe card for the printable instructions.
- Combine the dry ingredients. First, combine the flour, cocoa powder, baking soda and baking powder, then mix in the sugar and salt.
- Add wet ingredients. Mix in the eggs one at a time. Then add the vanilla, water, vegetable oil and buttermilk, continuing to mix until everything is just combined.
- Bake. Divide the chocolate cupcake batter between the wells of a lined muffin pan, about 2/3 full. Bake the cupcakes in a 350°F oven for 20 minutes, until they’re set. Once the cupcakes are out of the oven, remove them from the pan immediately and leave them on a wire rack to cool.
- Frost the cupcakes. Make sure the cupcakes have cooled completely before you frost them with your favorite buttercream recipe. Check out my easy piping technique in the section below, along with some fun decorating ideas.
Can I Bake This as a Cake Instead?
Absolutely! This recipe easily translates to a chocolate cake as well. To make this a layer cake instead, use two 9″ baking pans or three 8″ pans and bake for 20-25 minutes, or until a toothpick inserted into the center of the cakes comes out clean. You can refer to my perfect chocolate layer cake post for details.

Cupcake Decorating Ideas
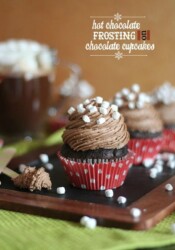
I love frosting these cupcakes with my creamy chocolate frosting or tangy chocolate cream cheese frosting. Another classic is this easy homemade Swiss meringue buttercream. Feel free to be as creative as you’d like! These are some more easy cupcake-decorating ideas:
- Halloween. Frost these chocolate cupcakes with my pumpkin butter frosting and top them with brown (or black), orange, and yellow sprinkles. See my witch’s broom cupcakes and cauldron cupcakes for more Halloween inspiration.
- Holidays. Top these cupcakes with crushed peppermint candy or Andes peppermint baking chips for an easy variation of Christmas cupcakes.
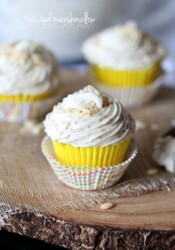
- S’mores. Make s’mores cupcakes by adding a thick swirl of marshmallow frosting and sprinkling over crushed Graham crackers.
- Mint chocolate. Try my mint chocolate chip frosting for that irresistible mint-chocolate combination.
- Peanut butter. Borrow the peanut butter frosting from my banana cupcakes. Go all out with a topping of chopped Reese’s peanut butter cups!
- Birthday. Turn these into the perfect birthday cupcakes with a swirl of party frosting.
How to Make a Perfect Frosting Swirl
There’s no wrong way to decorate a cupcake, but one of the BEST ways is to use a piping bag fitted with a piping tip to give your chocolate cupcakes a gorgeous piped frosting swirl. If you’ve never done it before, I have you covered with a quick tutorial below. Here’s how you can achieve perfectly swirled buttercream:
- Prepare a piping bag. First, snip the tip off a disposable piping bag. Then, fit your choice of piping tip tightly in the opening. For most of my cupcakes, I like to use a Wilton 1M tip.
- Fill the piping bag. Fill the bag about 3/4 full with frosting. Afterward, twist the bag until the frosting pokes out of the tip.
- Make a traditional swirl. Start by piping from the outside of the cupcake and work in a circle inwards.
- Or, pipe a rose swirl. Start from the inside and working outwards to create a rose swirl. Tada! Picture perfect swirled cupcakes, every time.

How to Store
- On the counter. Cupcakes are always best when enjoyed the day they’re baked. However, these will keep fresh at room temperature for up to 2 days. Allow the cupcakes to cool completely before placing them in an airtight container for storage. Resist putting cupcakes in the refrigerator, as this will dry them out!
- Freeze. You can freeze unfrosted cupcakes for up to 3 months. Wrap each cupcake in saran wrap, then place them in an airtight, freezer-safe container. Thaw on the counter for a few hours before topping with frosting.
More Cupcake Recipes

Chocolate Cupcakes
- Prep Time: 10 minutes
- Cook Time: 20 minutes
- Total Time: 30 minutes
- Yield: 36 1x
- Category: Dessert
- Method: Oven
- Cuisine: American
Description
My best-ever chocolate cupcakes recipe! These moist and fluffy homemade chocolate cupcakes are the only recipe you’ll need, perfect for any occasion. Just add a swirl of your favorite buttercream frosting.
Ingredients
- 1 1/2 cups Hershey’s Special Dark Cocoa Powder (you can also use regular cocoa powder)
- 3 cups all purpose flour
- 3 cups granulated sugar
- 1 Tbsp baking soda
- 1 1/2 tsp baking powder
- 1 tsp salt
- 3 eggs
- 1 1/2 cups buttermilk
- 1 1/2 cups warm water
- 3/4 cup vegetable oil
- 2 tsp vanilla extract
Instructions
- Preheat oven to 350°F.
- Line muffin pan with cupcake liners.
- In your stand mixer sift flour, cocoa powder, baking soda and baking powder together. Add in the sugar and salt.
- With your mixer on low speed add eggs, one at a time and then the vanilla, water, vegetable oil and buttermilk.
- Mix on medium for 2 minutes until combined.
- Fill liners 2/3 full and bake for 20 minutes until set.
- Remove from pan immediately and cool on wire rack.
Notes
- Makes approximately 36 cupcakes.
- I prefer the dark chocolate cocoa powder as it gives a deeper chocolate flavor; you can certainly use regular or Dutch processed cocoa powder!
- If you would like to make this recipe into a layer cake: Use two round 9″ baking pans or three round 8″ pans. Bake for 20-25 minutes, or until a toothpick inserted in the center comes out clean.
Want To Save This Recipe?
Find more recipes like this:


I made this frosting this past weekend for my husband’s birthday cake. He was in heaven. Probably the best frosting I have ever made. My son insisted that this was store-bought frosting. Said it was “almost too good.” And it was. This frosting recipe is a keeper; thanks!
What would be the bake time on the cakes?
This is absolutely the best cake recipe! My husband had been asking for a dark chocolate cake and this was a huge hit! I didn’t make the frosting but did they cupcakes as part of a German Chocolate cake. It was amazing! My question is if I make this as a cake how long should a bake it?
Thanks!!
I would start with 20 minutes and check it from there!
Thank you and sorry for the double post. My first wasn’t showing!
Hi, I have a quick question.
If i need to frost 2 8″ cakes do I double the frosting recipe?
Thanks 🙂
Yep! You might have a little leftover, but you can put some pretty swirls on top and it will be fine!
I love it when people validate my methods and equipment! I already have two of the M1 tips and make my swirl just like you showed. Thanks for sharing a great frosting recipe. It was just what I was looking for.
When I combined all the ingredients in my KitchenAid, it was a very dry mixture– what did I do wrong? I added a little more water and butter to get it to a more spreadable consistency, but the first round was straight up powder. This was my first attempt at homemade icing so maybe I’ll chalk it up to inexperience?
Yummy……
These looks apsolutly delicious.
Can I replace milk for buttermilk
You can add in 1 Tablespoon of vinegar or lemon juice into the milk to create homemade buttermilk!
Hey, I re-use those Wilton bags all the time. I either mark em for the tip that I used last so the next tip is the same width or larger at the end of the bag, or I fit the washed bag with the tip and heat shrink it to the end of the bag with a few quick licks from a lighter. I’ve used a bag up to 6 times before throwing it away. They clean up just fine if you soak em for just a few minutes in hot water with dish soap, then rinse em and hang em to dry.